If you’re ready to manage your WhatsApp Business conversations with WhatChimp, the first step is to connect your phone number. This process is quick and can be completed through the integration with WhatsApp Business.
Note: If you want to use an existing WhatsApp number, you’ll need to delete that number from WhatsApp or the WhatsApp Business App before connecting it to the WhatsApp Business API. You can follow the steps in our guide here: Migrate an Existing WhatsApp Number to a Business Account.
Follow these steps to get started:
Log in to WhatChimp #
• Log in to your WhatChimp account with your credentials.
• Once you’re logged in, you’ll see the main dashboard.
Go to Connect Account #
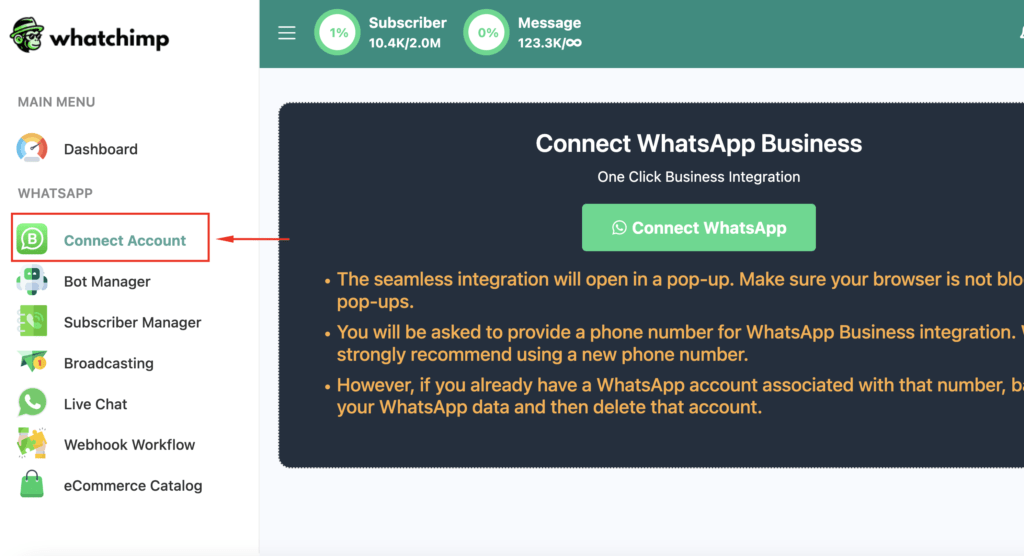
• On the left-hand navigation bar, click Connect Account.
• Alternatively, you can visit this link to go directly to the phone number connection page.
Click Connect WhatsApp #
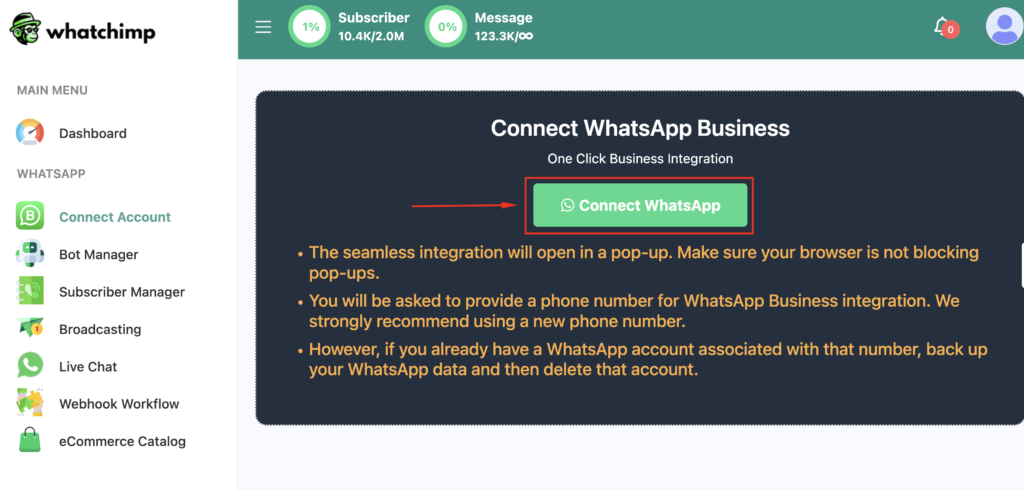
• On the Connect Account page, locate the button that says Connect WhatsApp.
• Clicking this button will open a new popup where you can proceed with the WhatsApp Business integration.
Log in with Facebook #
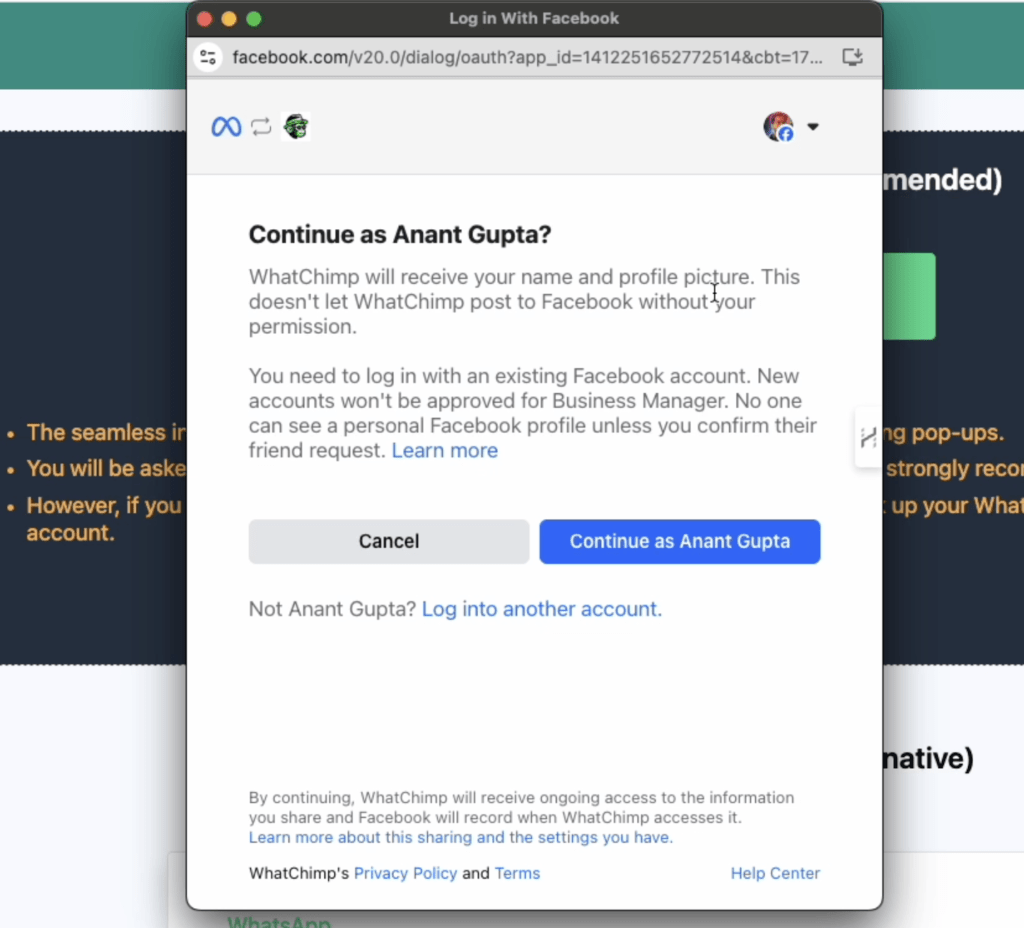
• After clicking Connect WhatsApp, you’ll be prompted to log in with Facebook if you are not already logged in.
• If you’re already logged into Facebook, you’ll continue with your current account. If not, enter your Facebook credentials to proceed.
Business Selection #
If you don’t have a Facebook Business Manager account, you may need to set one up or link your WhatsApp account manually.
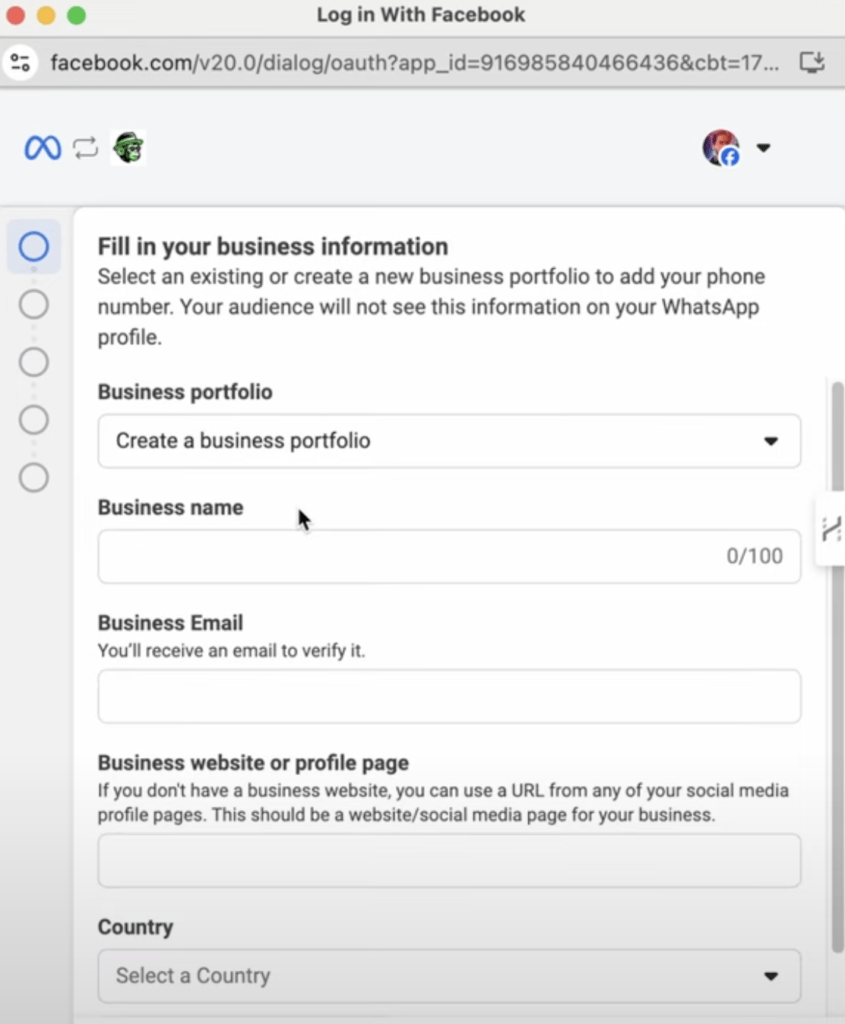
• If you have an existing Facebook Business Manager account, your business’s legal name will appear.
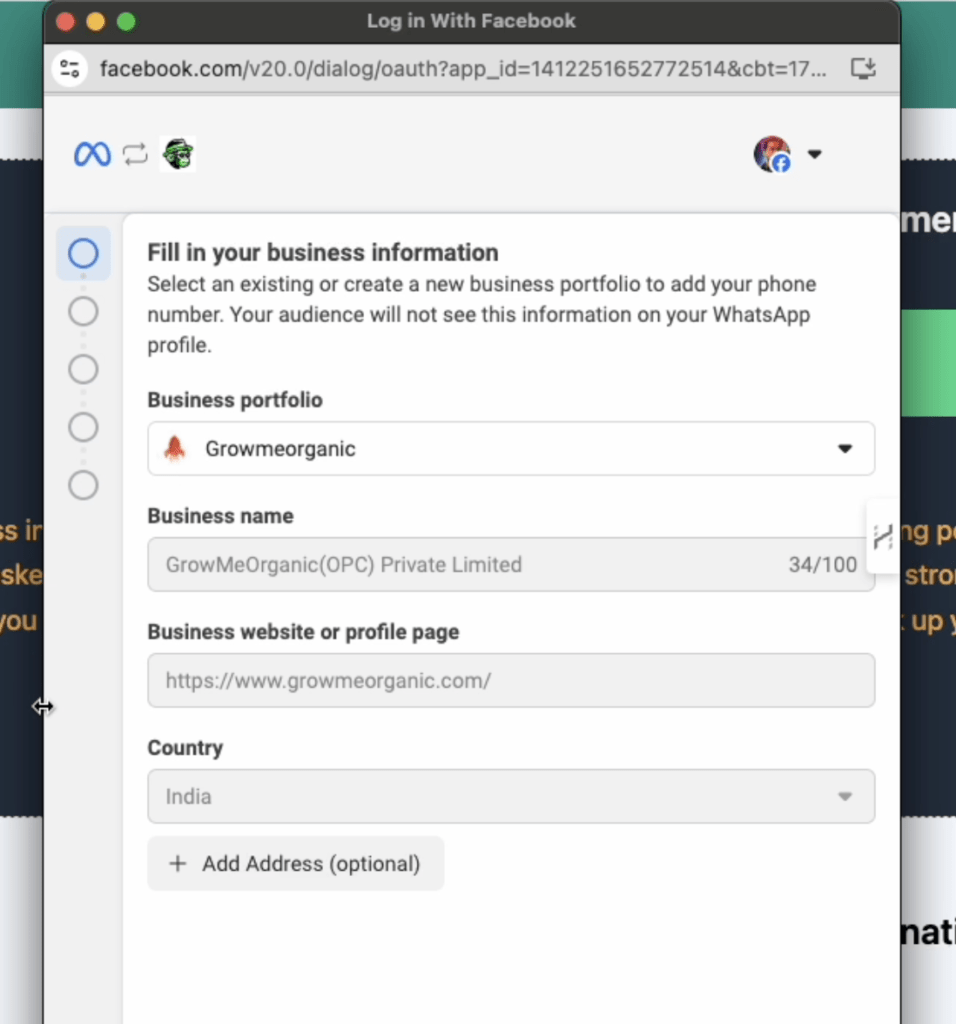
• If you’re an admin of the business, you can proceed. If you’re not an admin or have reached the maximum number of allowed businesses, the option will be disabled.
Select WABA (WhatsApp Business Account) and Profile #
Here, you have a few options:
• Create a new WhatsApp Business Account (WABA) and profile: If you’re starting fresh, you can enter all necessary details on this page. The website field is optional and will default to your business website, if available.

• Select an existing WABA and create a new profile: If you already have a WABA connected, you can simply create a new phone profile here.
• Select an existing WABA and profile: If you have both a WABA and a profile already, these details will be shown but not editable. You can modify them later through WhatsApp Manager.
Create a WhatsApp Business Profile #
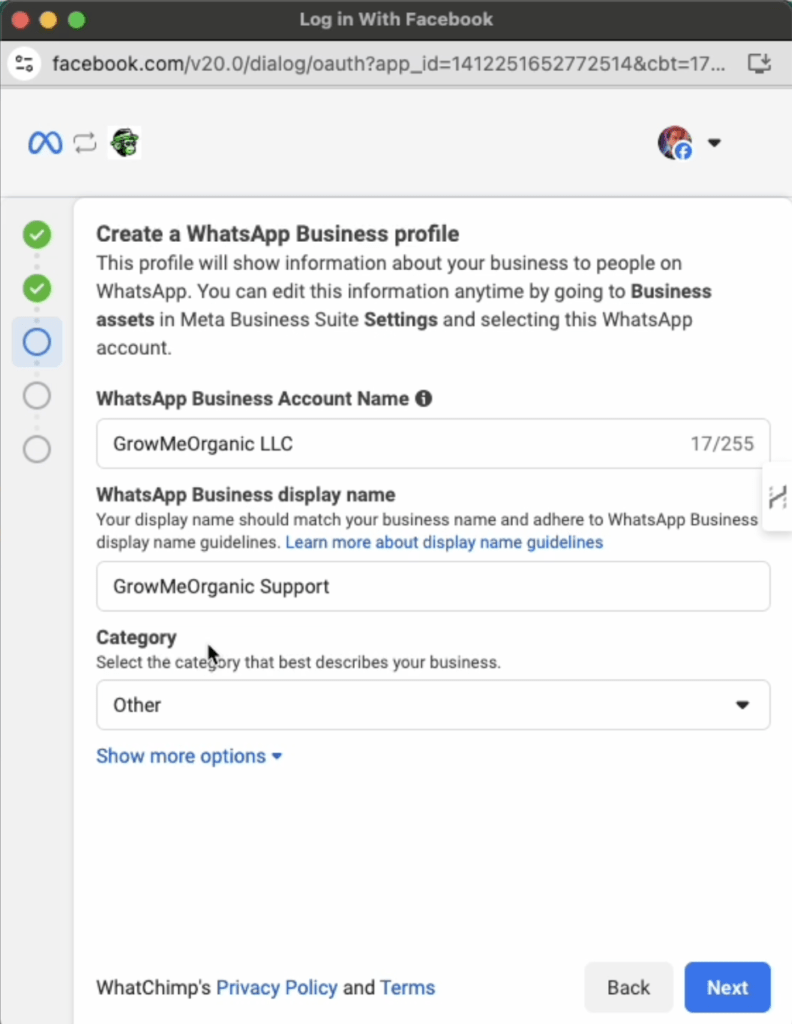
After selecting or creating your WABA (WhatsApp Business Account) and profile, the next step is to set up your WhatsApp Business Profile. If you’ve chosen to create a new WhatsApp Business Profile, this will involve the following steps:
• Business Account Name: Enter the official name of your business. This will be your business account name and will appear in all your communications.
• Display Name: Choose a display name for your business. This is how your customers will recognize you on WhatsApp. It’s important that the display name matches your business or is easily identifiable by your customers.
Important Note:
When choosing your Display Name, it’s essential to include your company name for verification purposes. If you wish to use your brand name, you must format it as follows:
“Brand Name” by “Company Name”
For example, if your company is XYZ Pvt Ltd and you want to use your brand name SuperTech, the display name should be:
“SuperTech by XYZ Pvt Ltd”
This ensures your display name is aligned with WhatsApp’s guidelines and increases the likelihood of your profile being approved.
• Category: Select the category that best describes your business. This helps WhatsApp identify the type of business you operate, and it also gives your customers context about the services or products you offer.
Verify Your Phone Number #
• Enter the phone number you want to connect to WhatChimp.

• WhatsApp will send a verification code via SMS or call. Input this code to verify your phone number.

Permissions #
• You will be prompted to review the permissions WhatsApp requires for your business. These are standard permissions that cannot be changed.
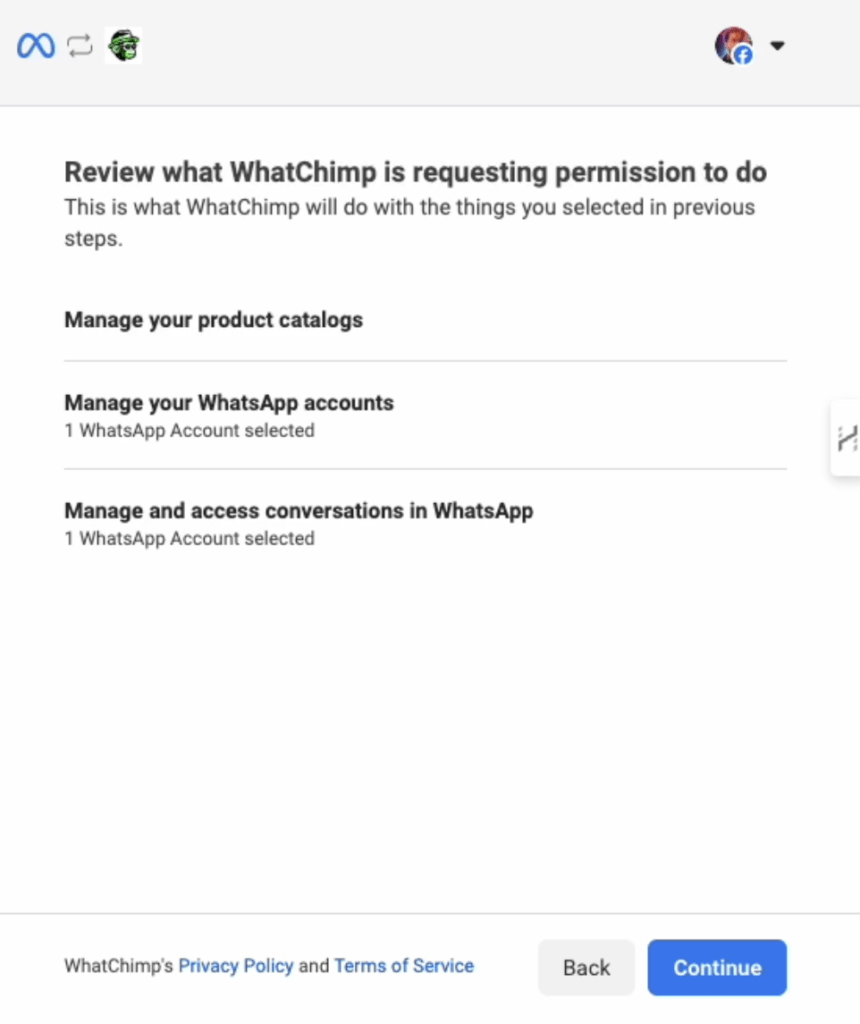
• Click Continue to acknowledge the permissions and proceed.
Restrictions to Keep in Mind #
• The phone number you use must be new and not currently linked to WhatsApp or the WhatsApp Business App.
Next Step: Add Payment Method & Verify Your Business #
Once your phone number is successfully connected, the next steps are to add a payment method for WhatsApp API billing and verify your business. These are essential to ensure smooth operations and uninterrupted access to the WhatsApp Business API.
Add Payment Method #
To avoid any interruptions in service, you’ll need to add a payment method to cover WhatsApp API usage charges. This step ensures that your WhatsApp Business API conversations are billed correctly based on WhatsApp’s per-conversation pricing model.
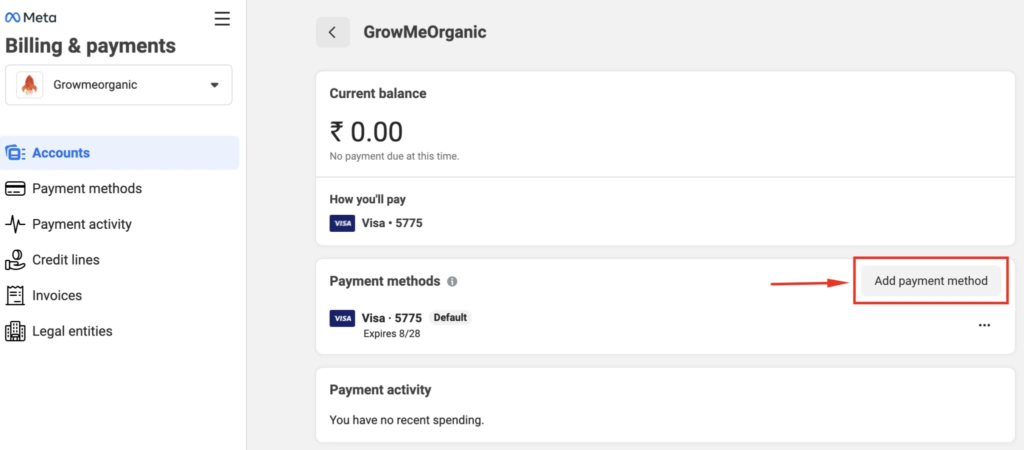
For a detailed guide on adding a payment method, please refer to our support article:
How to Add Payment Method for WhatsApp API Billing
Verify Your Meta Business Manager #
Verifying your Meta Business Manager is necessary to gain full access to WhatsApp’s business features. Verification adds credibility to your account, ensures compliance, and helps you unlock higher messaging limits.
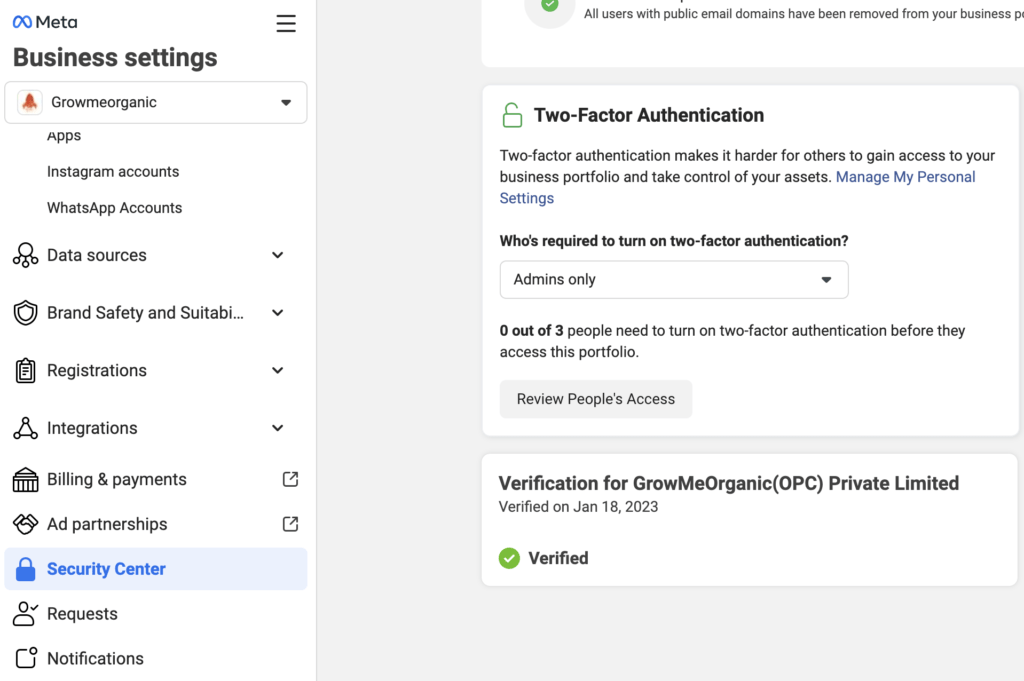
For a step-by-step guide on verifying your WhatsApp Business account, visit:
How to Verify Your Meta Business Manager
By completing these two steps, your WhatsApp Business account will be fully set up and ready to send and receive messages through WhatChimp. These are crucial steps to ensure your account runs smoothly without any disruptions.
Conclusion #
By following these steps, you’ll be able to quickly connect your phone number to WhatChimp and start managing your WhatsApp Business communications with ease.
For additional help, don’t hesitate to contact WhatChimp Support.
