
This guide will walk you through setting up a broadcast campaign in WhatChimp, from preparing your contact list to scheduling and sending messages.
Table of Contents #
- Preparing Subscriber List
- Importing Subscribers
- Types of Message Templates
- How to Create a Message Template
- Setting up a Broadcasting Campaign
- Scheduling or Sending the Campaign
- FAQs
Prerequisites #
- WhatsApp Business API must be connected to WhatChimp.
- Active WhatsApp Business API number.
- Clean Contact list
1: Preparing Subscriber List #
- Ensure you have a clean, ready-to-import list of contacts.
- Prepare a spreadsheet with the necessary contact details (name, phone number, etc.).
- Ensure the phone number column is accurate and formatted correctly.
- Download the spreadsheet as a CSV file from Google Sheets (UTF-8 encoding is required).
- Alternatively, you can import directly from your Google Sheet.
- When you have imported your file, map the data to align the columns properly.
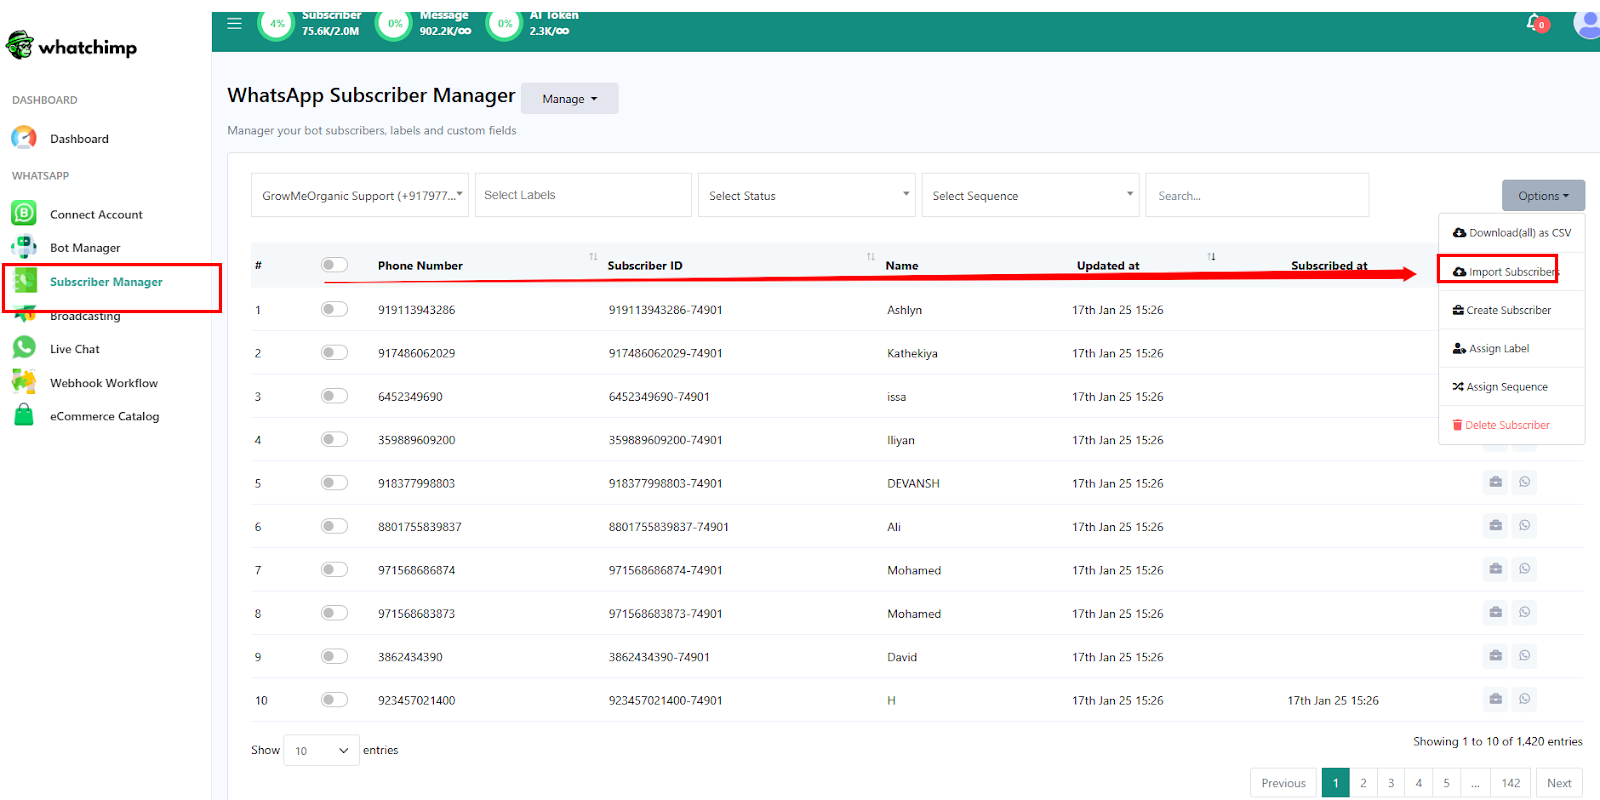
2: Importing Subscribers #
- Upload your clean contact list to WhatChimp:
- Go to Subscriber Manager in your WhatChimp dashboard.
- Click “Options” and select “Import Subscribers.”

- Upload the CSV file.
- Alternatively, you can import directly from your Google Sheet.

4. When you have imported your file, map the data to align the columns properly.

To broadcast messages to WhatsApp using WhatChimp, you can use message templates. Message templates are pre-defined messages that you can use to send to your subscribers.
3. Types of Message Templates #
There are two types of message template categories in WhatChimp:
Transactional message templates (Utility, Auth/OTP): These templates are used to send messages that are related to a specific transaction, such as a shipping confirmation or a payment receipt.
Marketing message templates: These templates are used to send messages that promote your products or services.
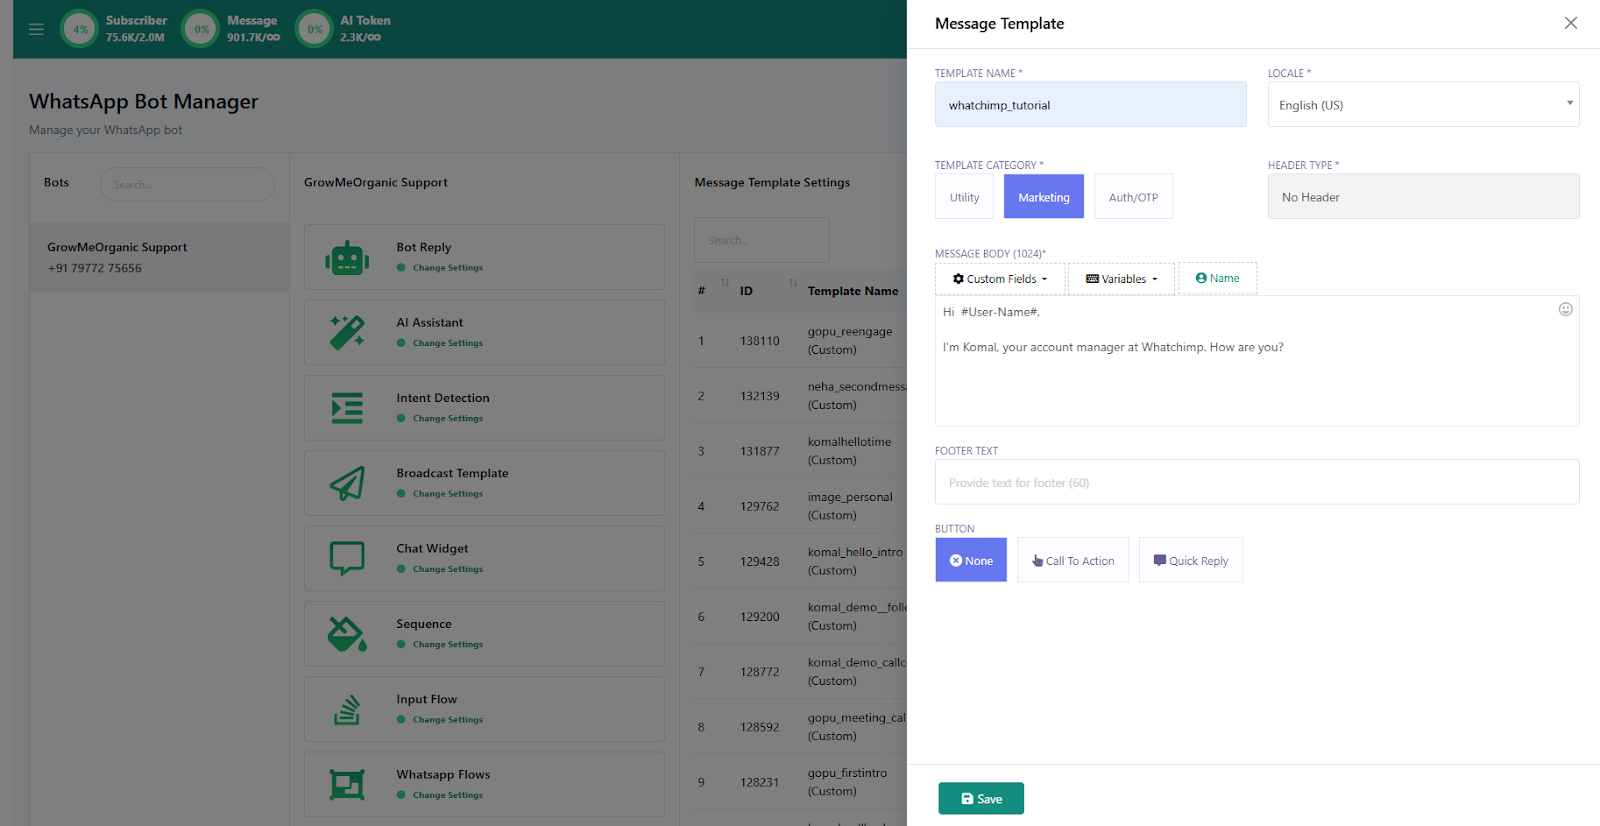
4. How to Create a Message Template #
- Go to Bot Manager > Message Templates.

- Click Create New Template and select from the list of templates.
- Fill in the required details:
- Message Content: Create a message template, including personalization with custom fields and optional call-to-action (CTA) buttons.
- Template Name: Use lowercase letters and replace spaces with underscores.

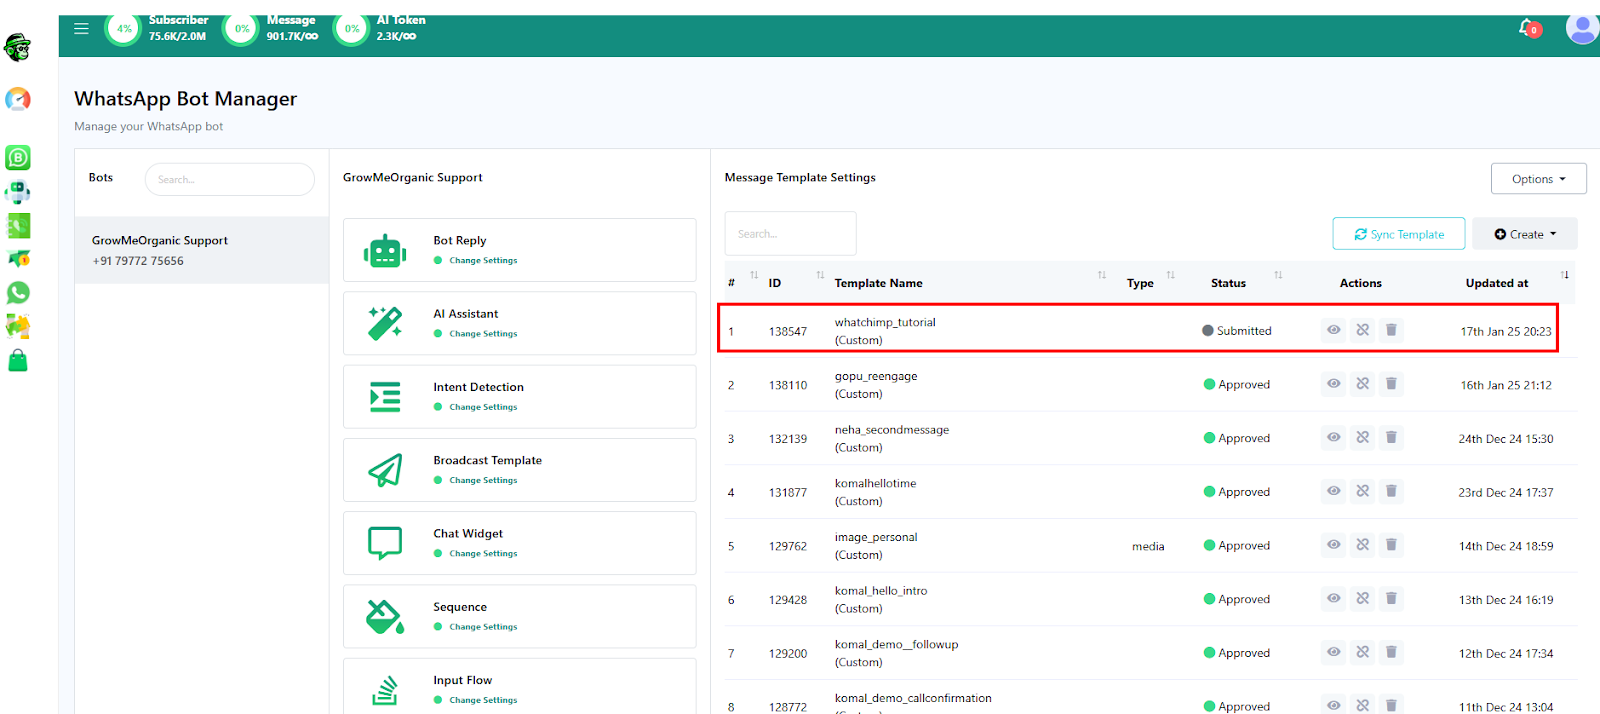
- Save and submit your template to Meta for approval (approval can take a few minutes).


5. Setting Up a Broadcast Campaign #
- Navigate to Broadcasting in your WhatChimp dashboard.
- Click Create New Campaign.
- Name your campaign (e.g., “Test Marketing Campaign”).
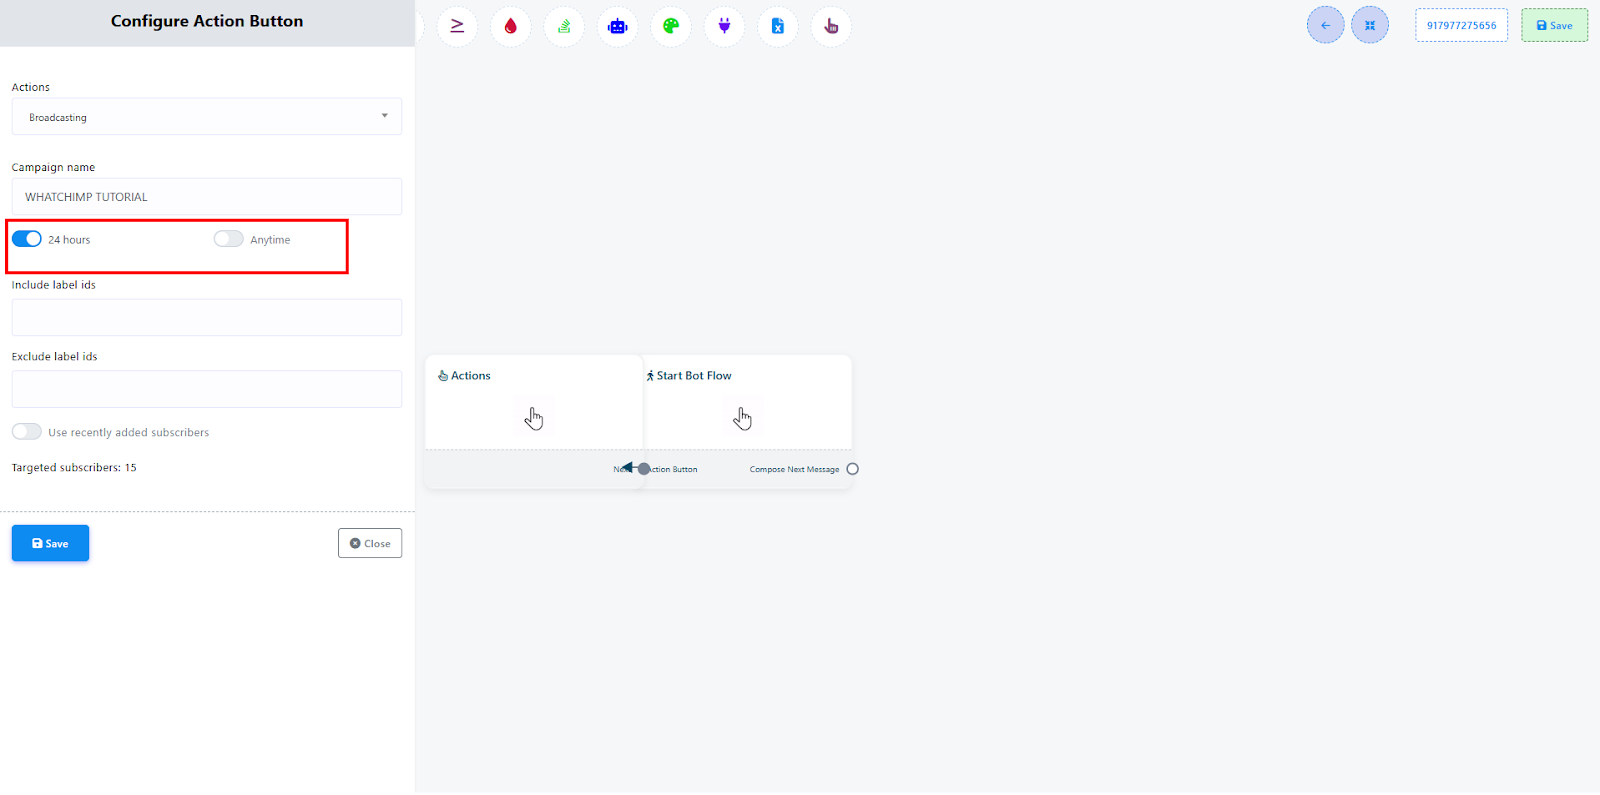
6. Selecting Target Audiences (Using Segments or Tags) #
- Target specific groups of subscribers to personalize your campaign.
- Choose between two audience options:
- 24-Hour Window: Send free messages to users who interacted with you within the last 24 hours.
- Anytime Messaging: Use an approved template to reach all subscribers.

- Choose between two audience options:
- Filter your audience using Label IDs:
- Include or exclude specific labels (e.g., “New Lead,” “Interested in Demo,” “Free Trial”).
- Use the “Recently Added Subscribers” filter to target a specific date range.
- Include or exclude specific labels (e.g., “New Lead,” “Interested in Demo,” “Free Trial”).
For Anytime Messaging: Use an approved template to reach all subscribers.
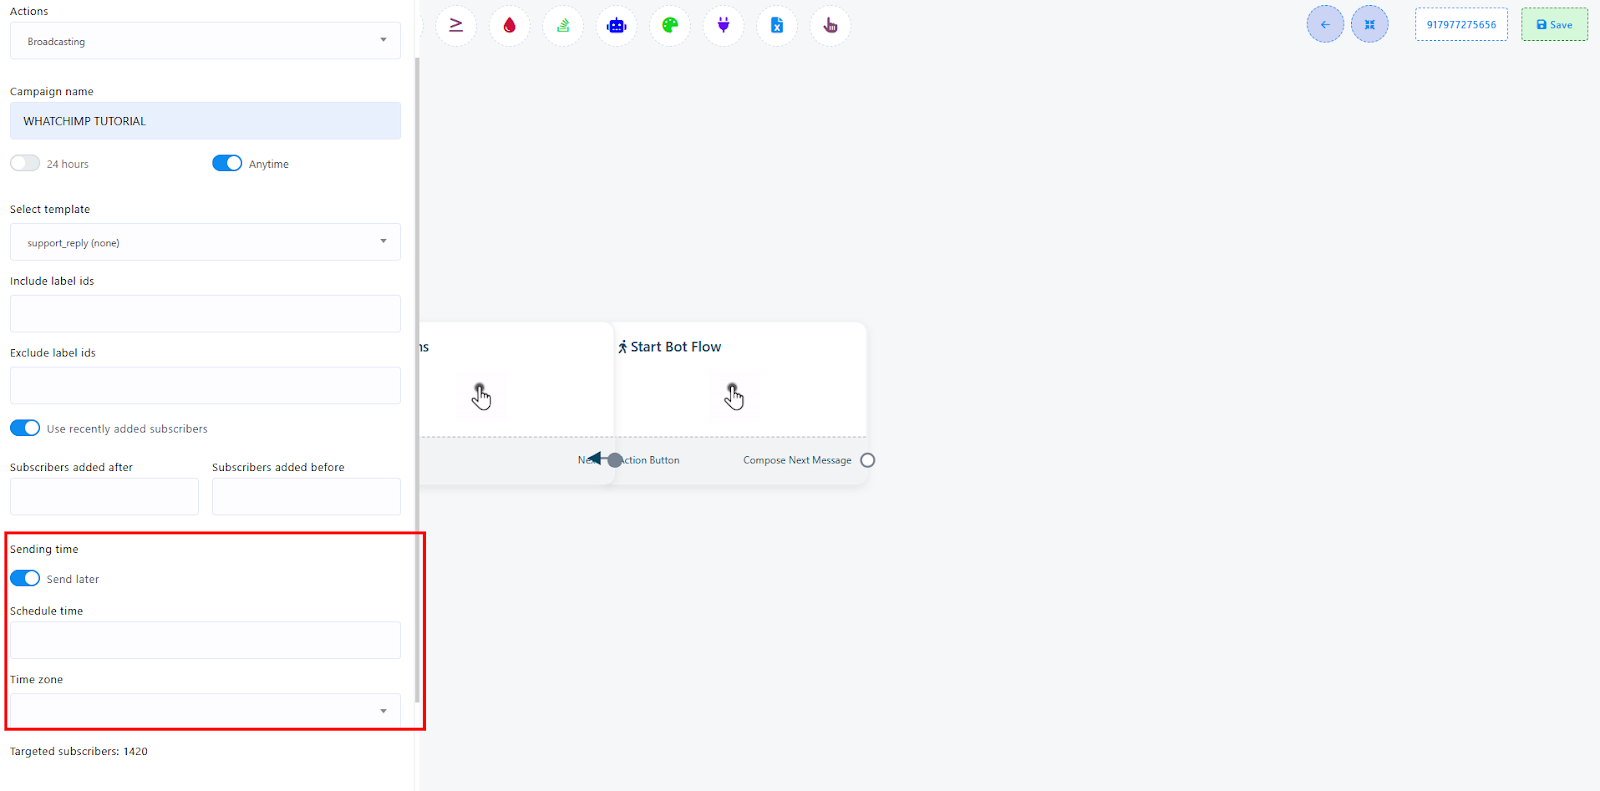
7. Scheduling or Sending the Campaign #
- Choose to either send the campaign immediately or schedule it for a later time.
- Adjust the time zone for optimal delivery.

- Adjust the time zone for optimal delivery.
- Save and execute your campaign:
- Name your bot flow and save the configuration.
- Once saved, your campaign will be executed, and its status will update in the dashboard.
8. FAQs #
- What if my template is rejected?
Revise content to meet WhatsApp guidelines and resubmit. - Can I send messages without a template?
Only within 24 hours of user interaction.
