
Learn how to manage customer support and follow-ups using the Live Chat Dashboard. Explore features like sending messages, organizing chats, and resolving conversations.
Prerequisites #
Before you start, ensure you have:
- Access to the WhatChimp Live Chat Dashboard.
- Labels and custom fields set up for organizing chats.
Table of Contents #
- What is WhatChimp Live Chat?
- Subscriber List Section
- Chat Window Section
- Chat Actions Section
- FAQs and Troubleshooting
What is WhatChimp Live Chat? #
WhatChimp’s Live Chat is a powerful tool for managing customer conversations on WhatsApp. It’s divided into three main sections:
Subscriber List – Manage all your customers in one place.
Chat Window – Chat with customers and use advanced features.
Chat Actions – Organize conversations and collaborate with your team.
Let’s explore each section step by step.
1. Subscriber List Section #
This is where you’ll see all your WhatsApp subscribers. Here’s how to use it:
1: Search for a Subscriber #
Use the Search Bar at the top to quickly find a subscriber by typing their name.
2: Advanced Search With Filters #
Click the Filter Option to sort subscribers by:
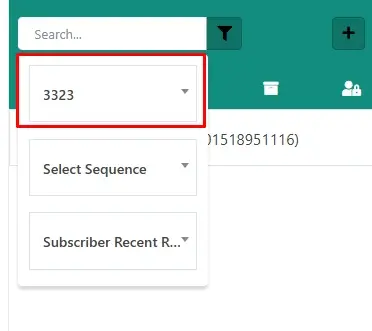
Labels: Click on the select label, and a drop down menu full of all the labels will appear. From here just choose a label and in the subscriber list you can see only the subscribers that are in that label.

Sequences: Filter by automated message sequences.
Just like select labels, Select Sequence also lets you filter out all the subscribers that are under a sequence.
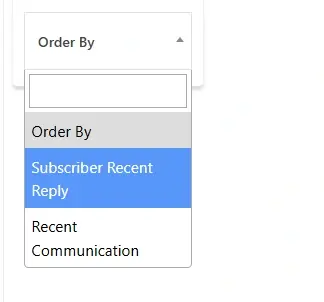
Now if you click on the Order by, There are two more options available.
Subscriber Recent Reply– This one will filter out the subscribers that had recently replied to you.
Recent Communication– It will filter out all subscribers that you have recently replied to.
3: Manage Chats #
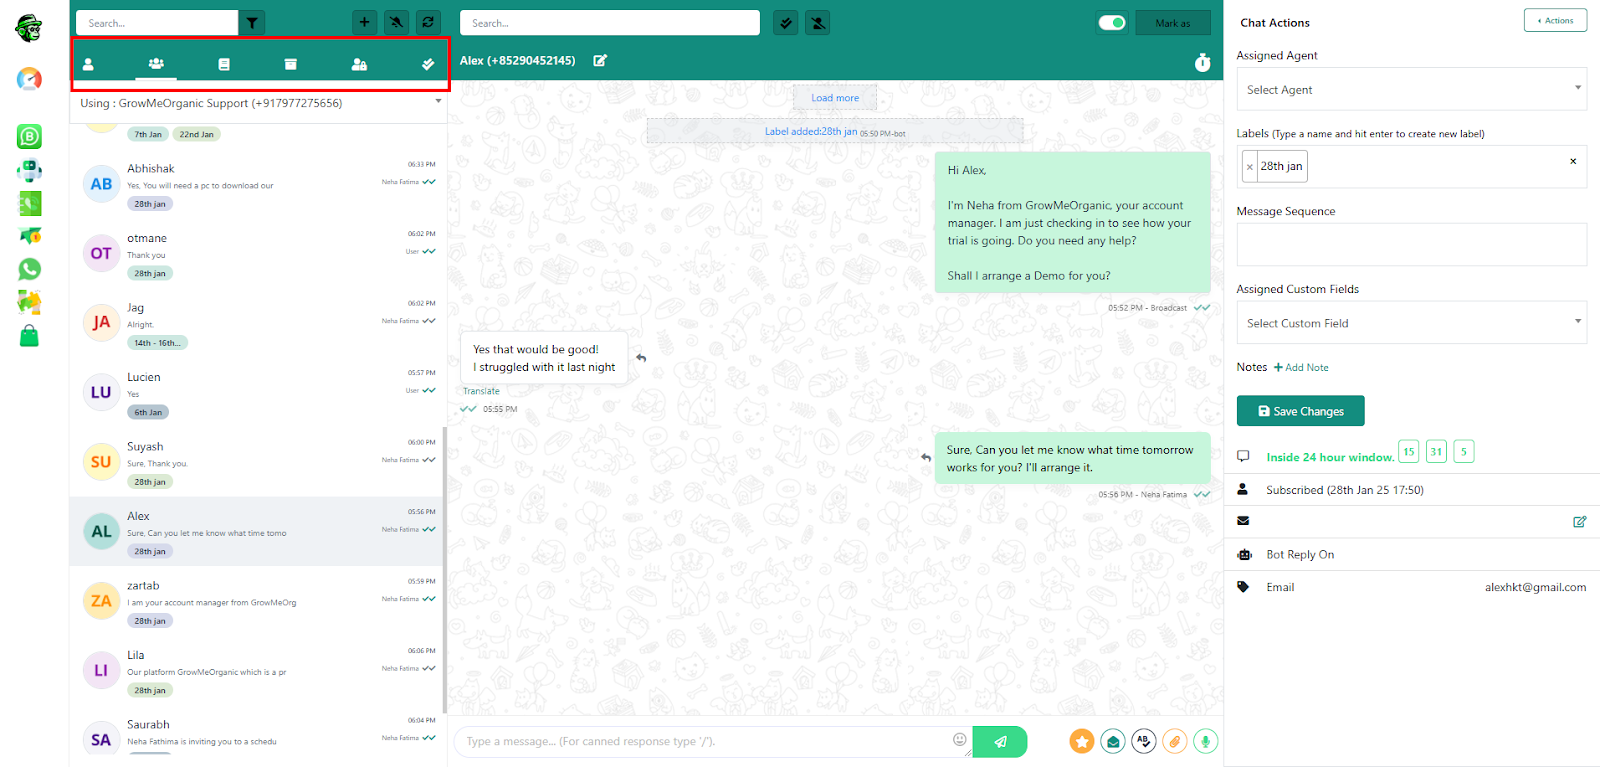
Mine: WhatChimp’s Team Collaboration feature allows you to assign specific agents to handle particular customers. You can create multiple agents for different chats. Once an agent is assigned, they can view their assigned chats in the Mine section of the Subscriber list.
All Chats: This option shows you a list of all customer conversations.
Unread Chats: Find messages you haven’t read yet.
Archived Chats: Save old conversations for future reference.
Blocked Chats: Block spam or abusive messages.
Resolved Chats: Keep track of resolved customer issues.
2. Chat Window Section #
This is where you chat with customers. Here’s how to use its features:
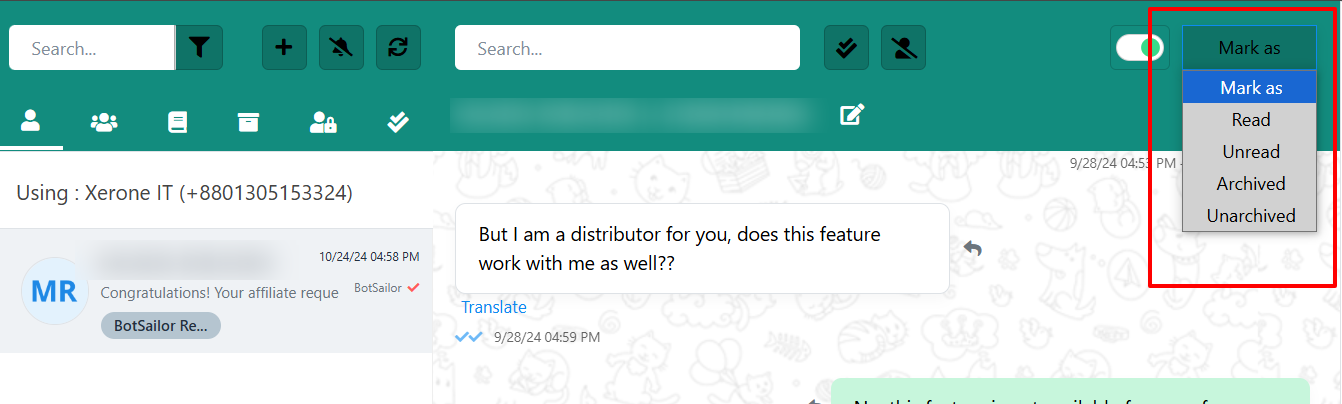
1: Mark a Chat #
You can make any customers chat unread or archive
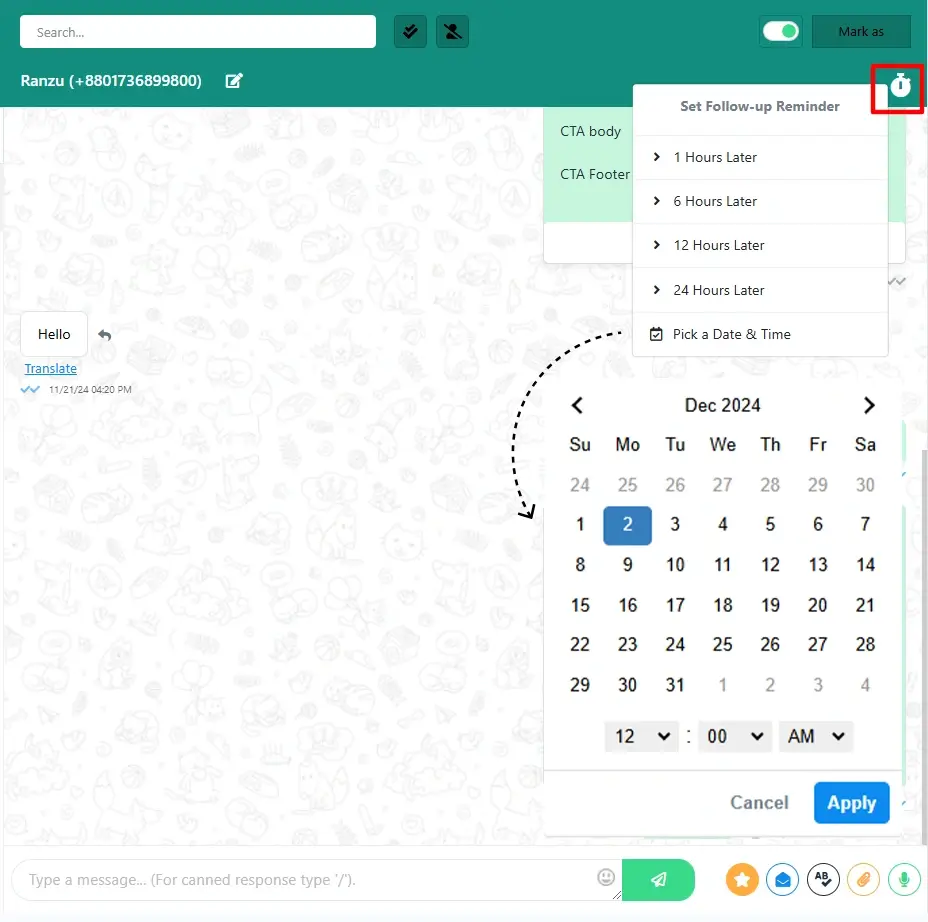
2: Set a Follow-Up Reminder #
The Follow Up feature acts as a reminder, allowing you to schedule a time to reply to a customer’s chat when you’re unable to respond immediately.
- Click the Follow-Up Reminder button.
- Choose a time or customize the date and time for the reminder.
3: Translate a Message #
Click the Translate Button under a message to translate it into your preferred language.

4: Use Signature Messages #
Before joining a chat, tick the Send Signature Message option. This lets the customer know which agent is helping them.
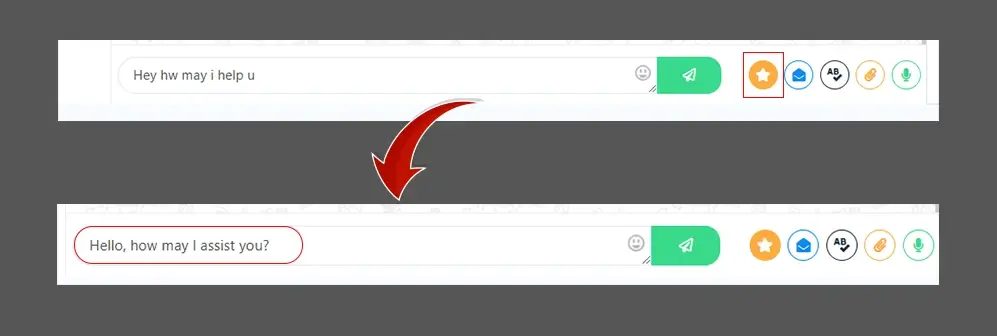
5: Rewrite with AI #
Type a message and click Rewrite with AI to fix grammar or improve the text.
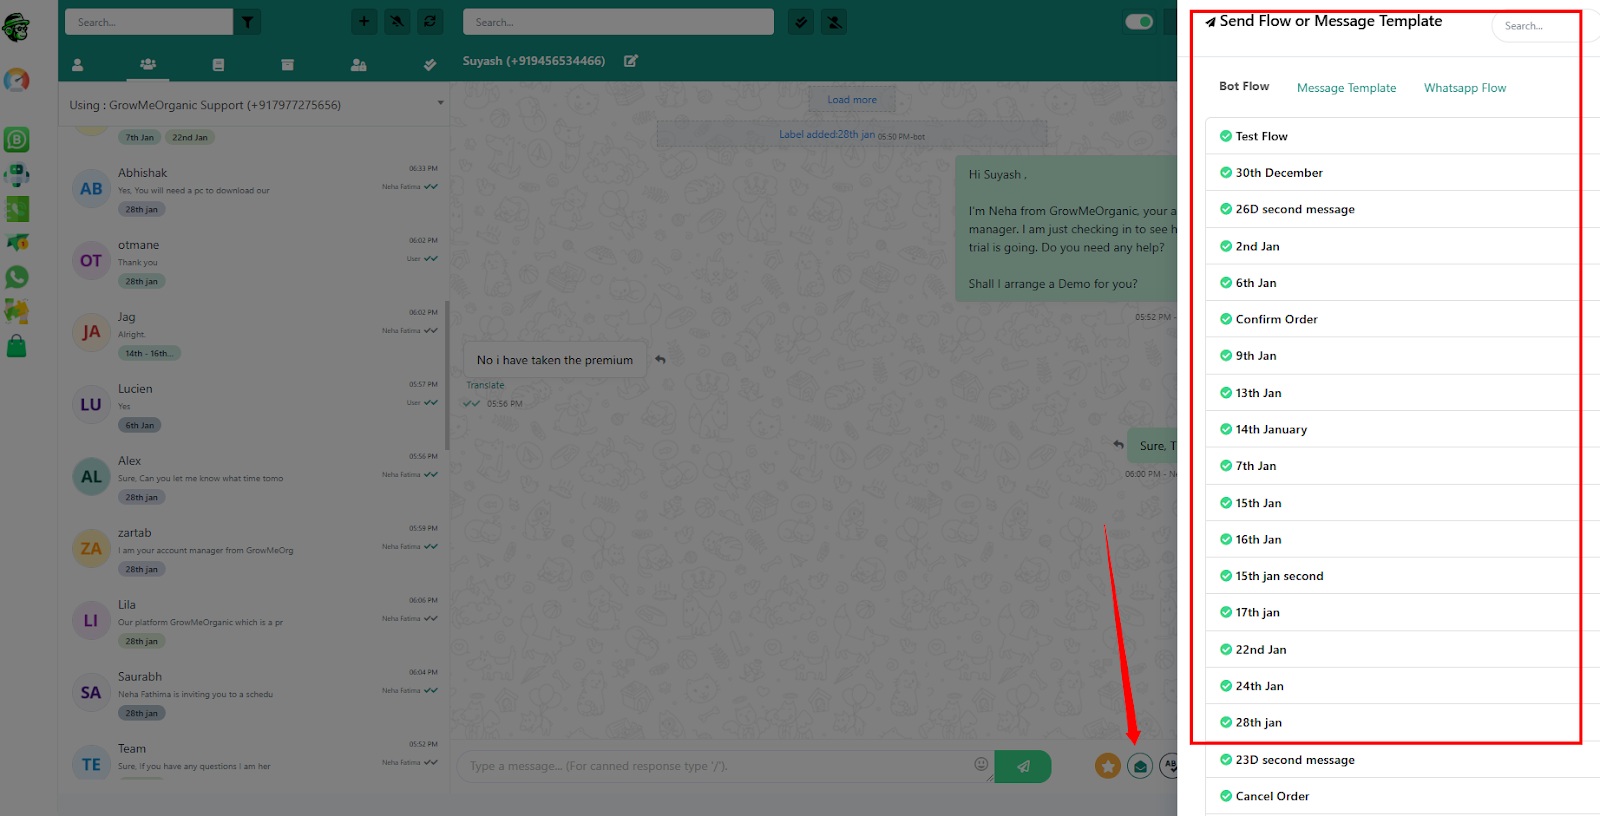
6: Send Flows or Message Templates #
Send flows or message templates are pre-written sequences of messages or bot flows that you can use in live chat conversations.
- Click the Message Template Button.
- Select a pre-written template or bot flow, fill in the details, and send it.
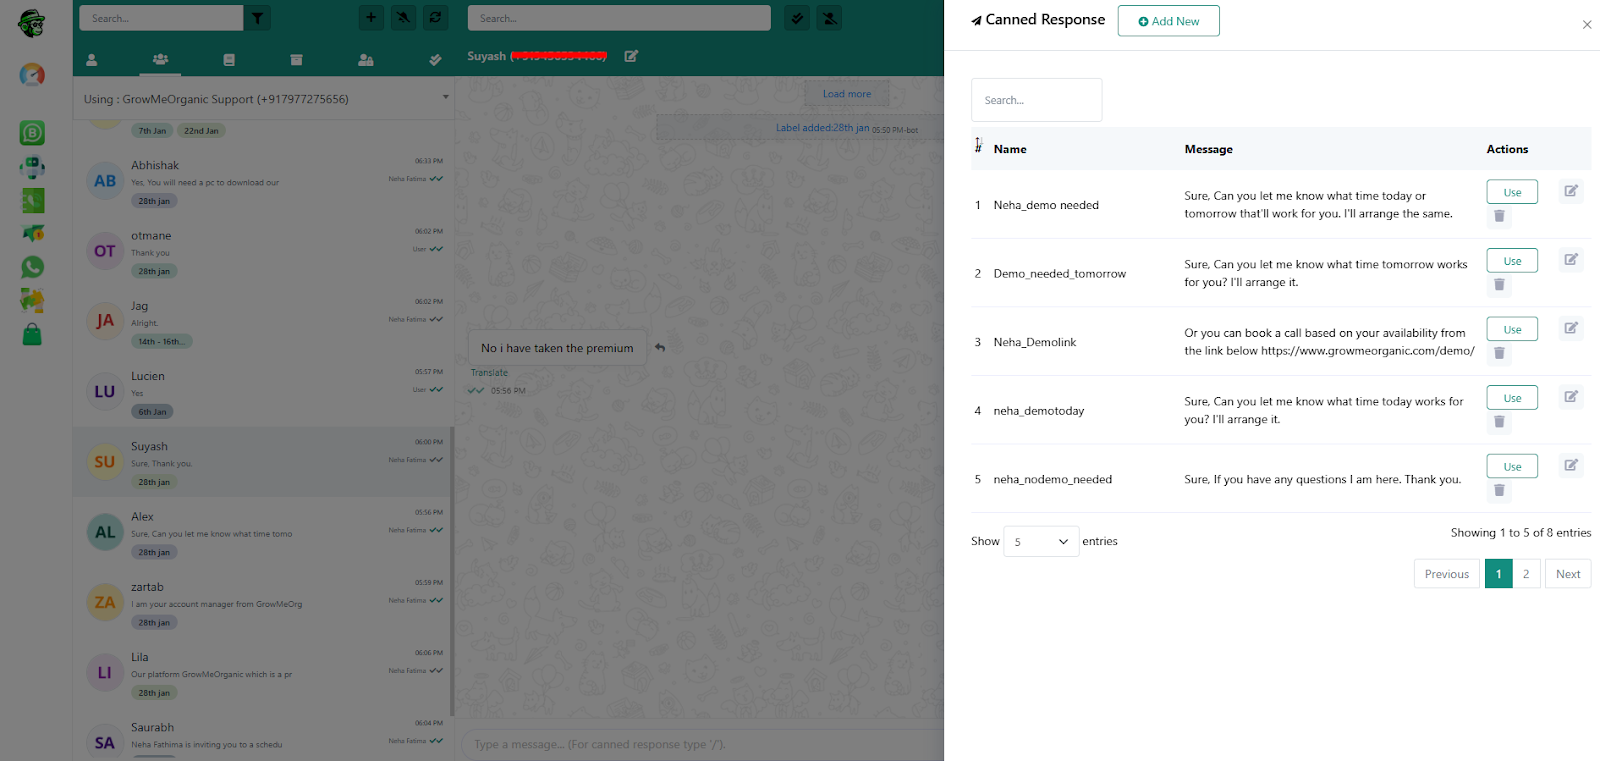
7: Use Canned Responses #
Canned Responses in live chat are pre-written messages that you can quickly insert into a conversation especially for frequently asked questions or common scenarios.
- Click the Canned Response Button.
- Choose a pre-written response or create a new one.
8: Share Attachments #
You can simply select and send multiple files (images, documents, etc.) simultaneously using the drag and drop upload feature
- Select multiple files holding CTRL and then drag them all to your browser icon and drop them in the chat window and they will be uploaded instantly
- Add a caption or directly click on save button to send it all at once.

- Alternatively, you can use the attachment button to upload your file

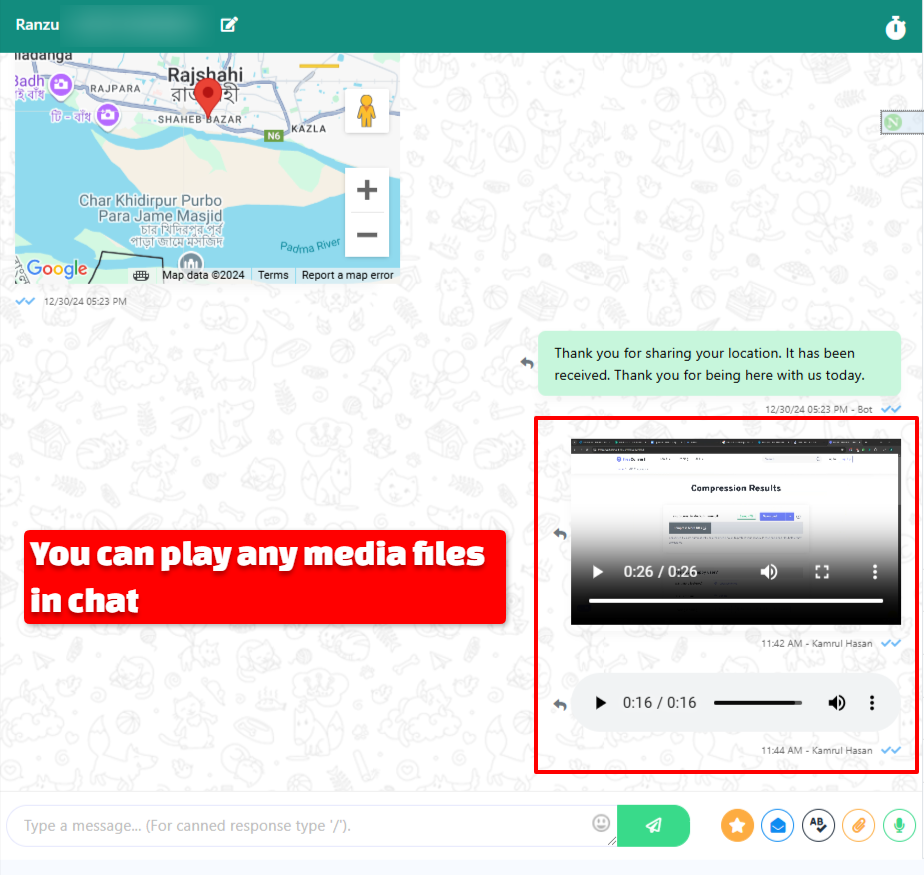
9. Audio & Video Embedded Display: #
You can share and play audio and video files directly in the chat window.

3. Chat Actions Section #
This section helps you manage conversations and collaborate with your team. Here’s how to use it:
1: Use the Action Button #
You can easily subscribe or unsubscribe customers, pause bot replies temporarily, and reset user input flows to ensure a seamless experience using the Actions button.
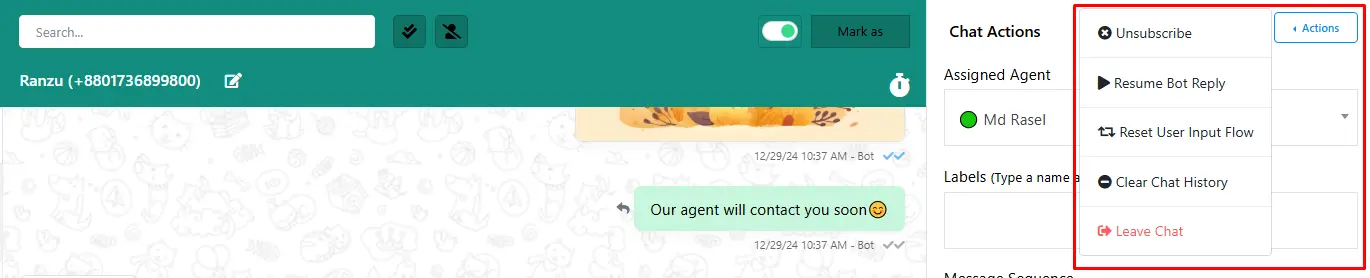
- Subscribe / Unsubscribe: You can subscribe or unsubscribe a customer based on your need by using this option. In the image you can see there’s an unsubscribe option visible, that means this customer is currently subscribed. If it showed subscribe that means the customer is not subscribed and you need to click on that option to subscribe to him.
- Resume / Pause Bot Reply: By using this option you can easily take control of the conversation. Simply pause the bot reply and provide customer support and resume bot reply again.
- Reset User Input Flow: You can easily reset all the user input flows that were set for a customer with just one click on this option.
- Clear Chat History: Clicking on this option will clear the chat history from your live chat. But the customer will still have full chat history intact on his whatsapp or any other platform he contacted from.
- Leave Chat: When you are finished assisting a customer query, you can depart from this conversation by clicking on this “Leave Chat” option.
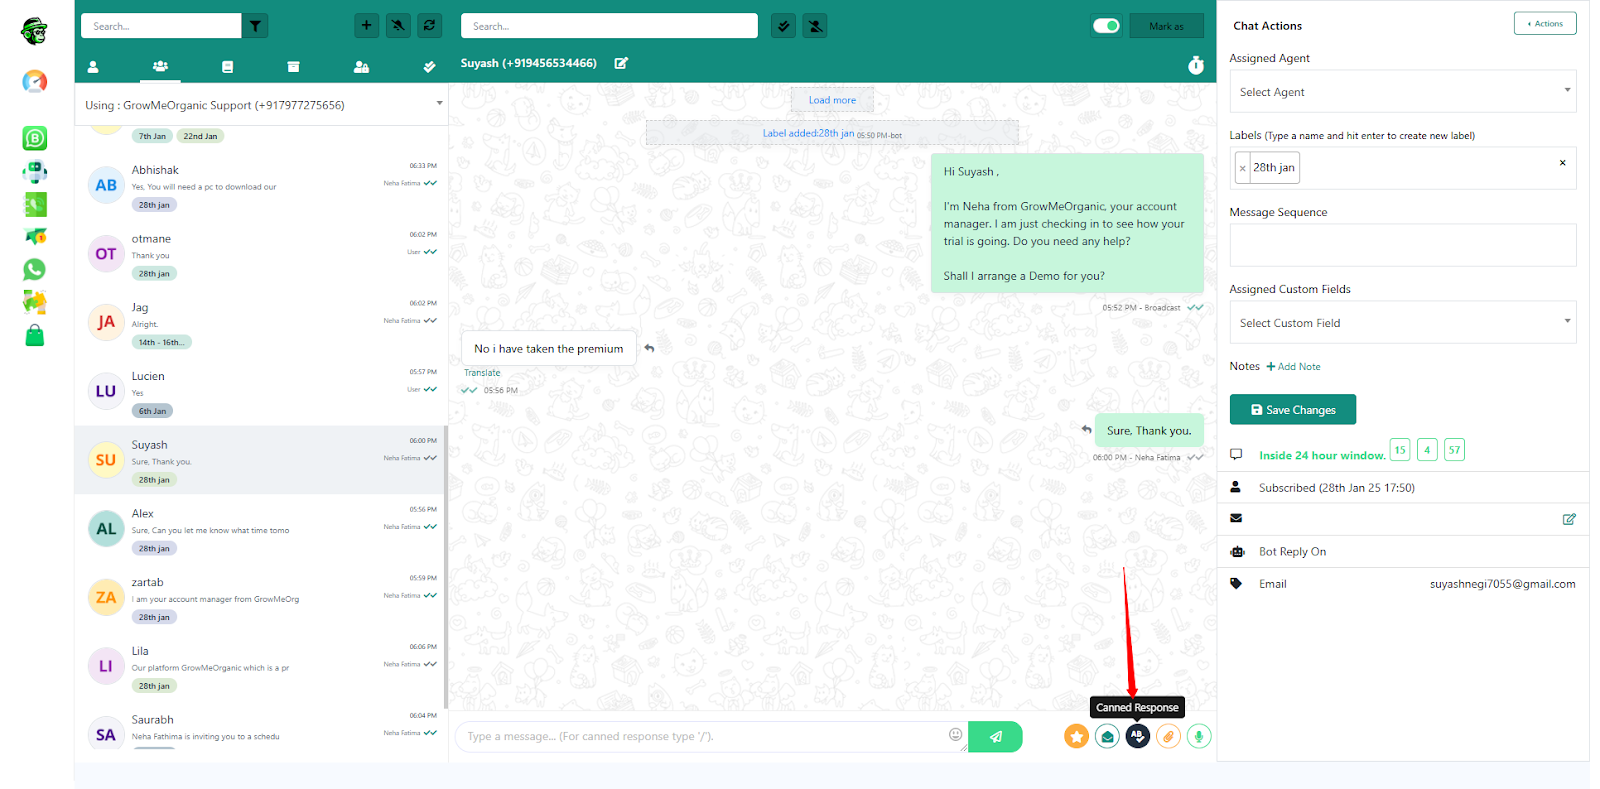
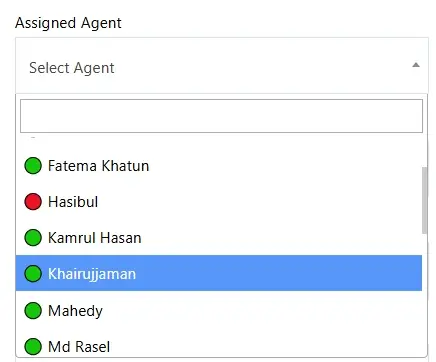
2: Assign an Agent #
you can assign an agent to a specific subscriber, add a subscriber to a label, or create a message sequence.
- Click Assign Agent.
- Choose an agent from the dropdown menu and save the changes.
- Your agent will also get a notification that he was assigned for this customer at the same time.
3: Add Labels #
Labels in live chat are like tags or categories that you can use to assign a customer to a specific category.
- Click Labels.
- Choose a label from the dropdown menu or create a new one.
- You can add multiple labels if needed.

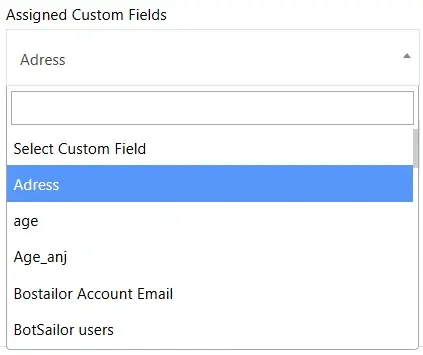
4: Use Custom Fields #
Assigned Custom Fields feature to collect essential customer data to provide more personalized assistance.
- Click on the Assigned Custom Fields menu
- Choose a custom field from the menu. You can create a new custom field from the subscriber manager.
- Choose a field (e.g., “Address”) and enter the customer’s details.
5: Add Notes #
Click Add Note to save important information about the customer.

6: Check the 24-Hour Window #
This is a countdown timer that shows how much time you have to reply before the chat closes (WhatsApp’s rule).
Learn more: What is the 24hour rule and how to comply effectively
4. FAQs and Troubleshooting #
FAQs
- What if messages don’t send? Check your internet connection and ensure the customer is within the 24-hour response window.
- Can I reassign chats to different agents? Yes, use the “Assign Agent” option.
