Verifying your Meta Business Manager is essential to unlock the full potential of WhatsApp campaigns. Once verified, you can send messages to a larger number of customers without restrictions. This guide will walk you through the process of verifying your account, ensuring smooth WhatsApp marketing operations with WhatChimp.
Link Your WhatsApp Business Account to WhatChimp #
Before starting the verification process, ensure your WhatsApp Business account is linked to WhatChimp. Follow this article to connect your number with WhatChimp.
Start Business Verification #
1. Go to Security Center
2. Select Your Business Account: Choose the business account you’ve set up for WhatsApp. This will take you to the appropriate account settings.

3. Start Verification: Under the Business Verification section, click on the Start Verification button.
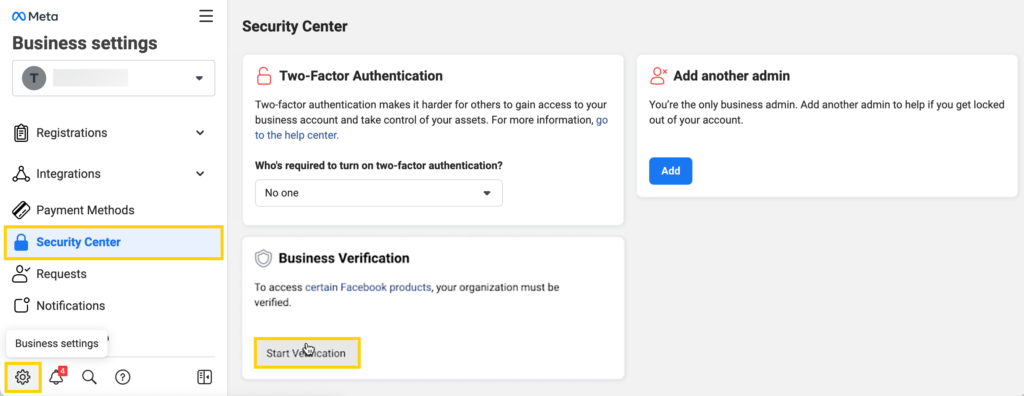
Provide Business Details #
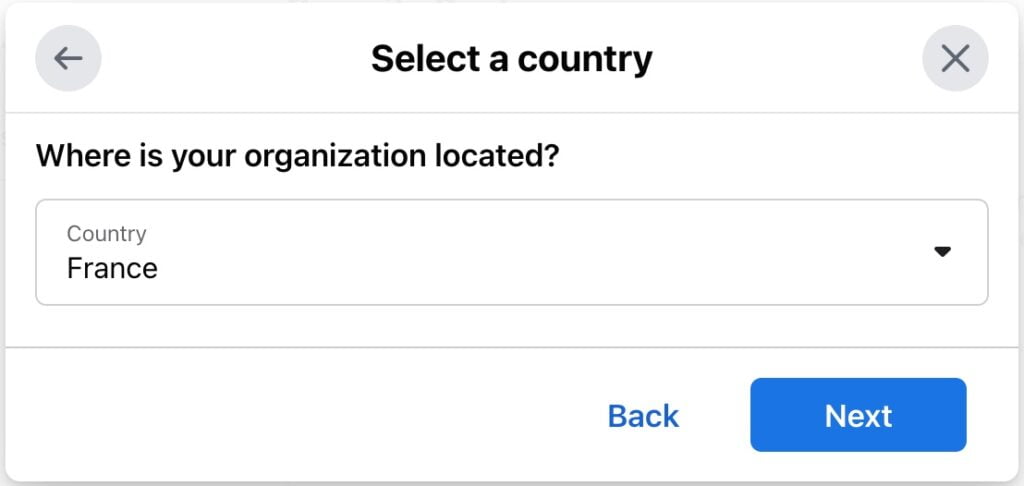
1. Select Your Country: Choose the country where your business is registered.
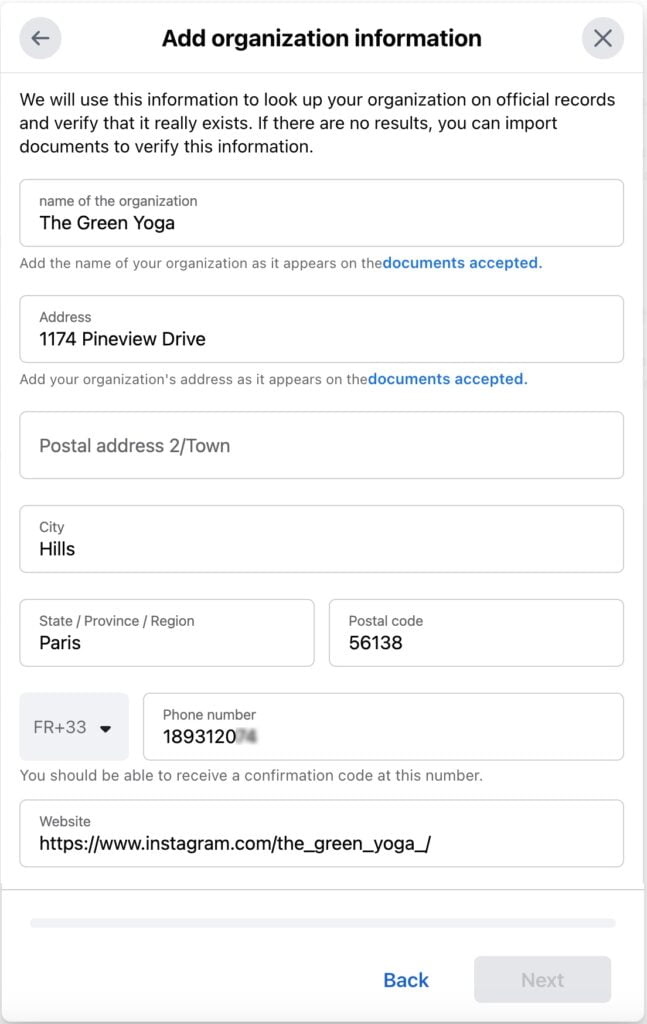
2. Add Business Information: Enter your Business Legal Name, Address, Phone Number, and Website. Make sure these details match the information on your supporting documents.
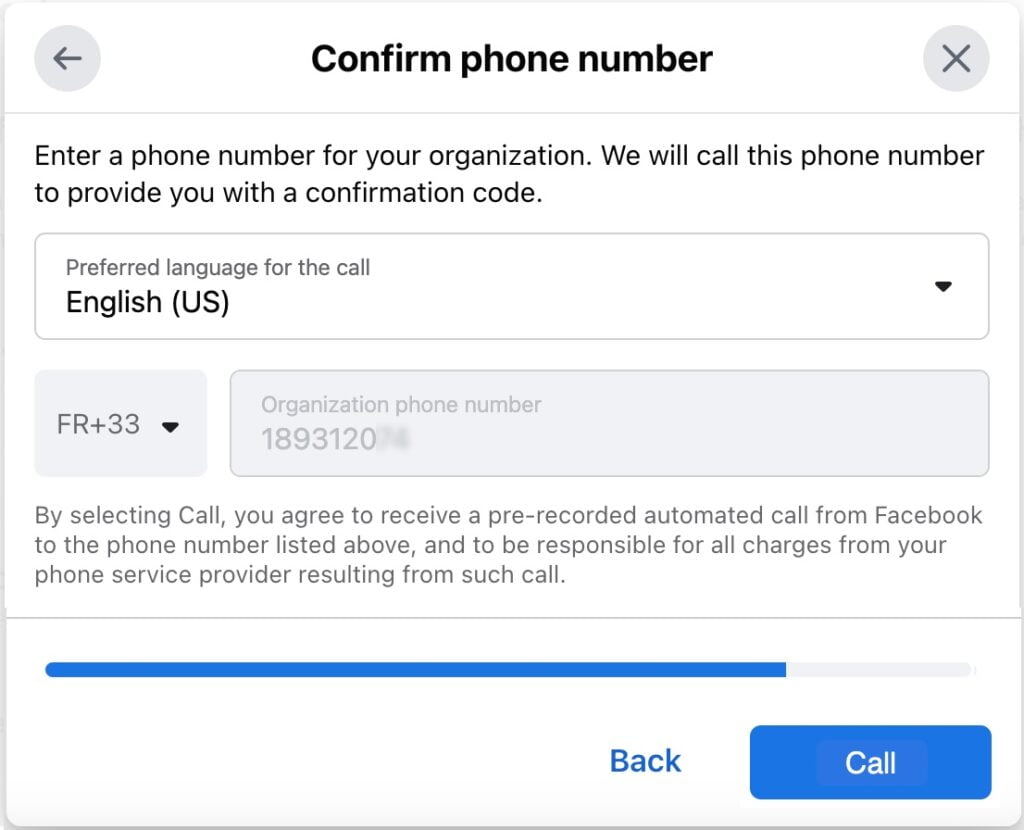
3. Choose Contact Method: Select how Meta will contact you for verification. You can choose from email, SMS, phone call, or domain verification.
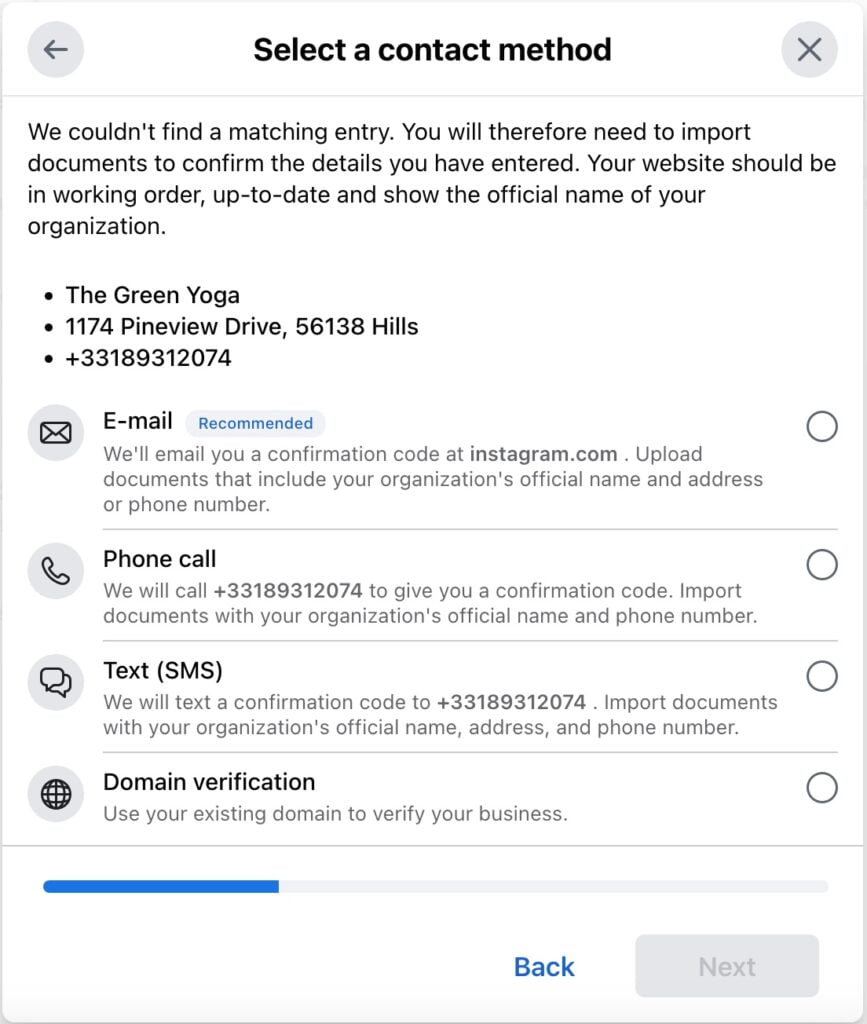
Important: Use a phone number or email address you have immediate access to for verification.
Submit Supporting Documents #
1. Upload Documents: Provide the necessary documents, such as your Business License, Certificate of Incorporation, or Business Bank Account Statement.
| ✅ Acceptable Documents | ❌ Unacceptable Documents |
| Certificate of Formation or Incorporation (ex: GST Certificate) Articles of Incorporation Business License and Permits Business tax registration Business Bank Account Statements Udyog Aadar (UID) Udyam Certificate Business Credit Reports Utility Bills Permanent Account Number Card (PAN) Shop establishment certificate | Invoices Purchase orders Self-filled applications for the company Tax returns filed by you or your company Personal bank statements Website print Other documents like company flyers, letterheads, … |
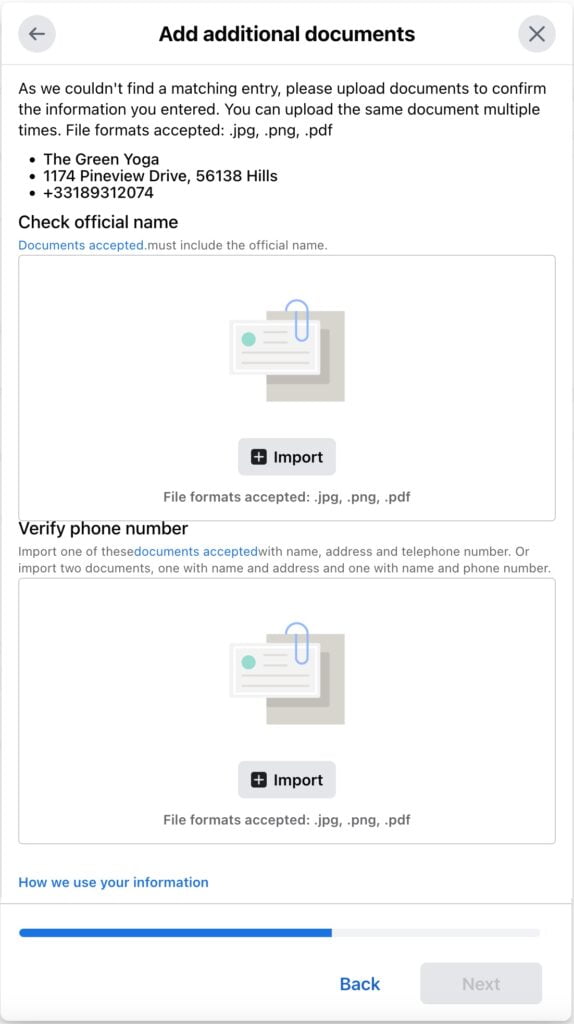
2. Confirm Contact Details: Double-check that your contact information is correct.
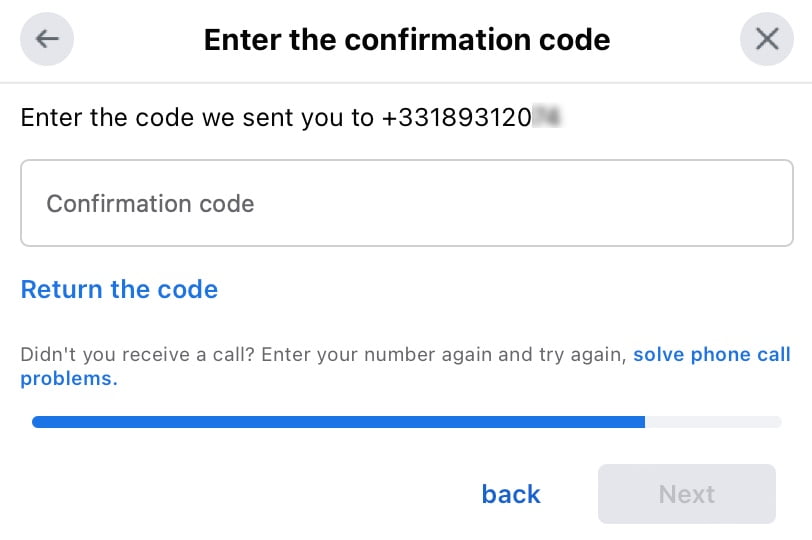
3. Enter Verification Code: Once you receive the code via your selected method, enter it to complete the verification process.
If your documents are not in a supported language, make sure you provide an official English translation from a certified agency.
Wait for Meta’s Approval #
Meta will review your submission, and you’ll receive a confirmation email once your account is verified. You can track the status of your verification in the Security Center. The process may take up to 30 days.
After Verification #
Once your Meta Business Manager is verified, you’re ready to start your campaigns. Remember to check your messaging limit, which is now based on your phone number reputation rather than the verification status. Learn more about messaging limits here.
Tip: If your verification is rejected, don’t worry. Follow this guide to fix the issues and resubmit for verification.
Now you’re all set to create and launch your first WhatsApp campaign with WhatChimp!

